This is a test of the add-hock video equipment that I'm cobbling together for this fall's series of demos and interveiws. I've got to quickly figure out how to shoot, edit together, and upload several formates all at once. Not really a smart approach, but hey, we make do with what we have...
My motto is... "If you don't mind looking silly, you can have a whole bunch'a fun and you'll learn a whole lot more than the guy wanting to look really smart." Hopefully what the kids and I learn about shooting scripted demos over the next few weeks will translate into a decent strategy for capturing insights into the the studio life of a few of our local ceramic artists. I want to talk to a few of the artistic elders of our community and I would really like to get these interviews in while the oppertunity exists...
Showing posts with label demonstration throwing ceramics. Show all posts
Showing posts with label demonstration throwing ceramics. Show all posts
Saturday, October 17, 2009


Thursday, May 14, 2009
Throwing AgateWare Yunomi
This is a short stop motion animation video the kids and I shot last weekend demonstrating the throwing of an "agateware" yunomi. This is a simple process of throwing two contrasting clays together to create a marvelously swirled effect directly in the clay body. I finally got around to pasting together a first draft to share....
Sunday, December 21, 2008
WinterVines Cairn
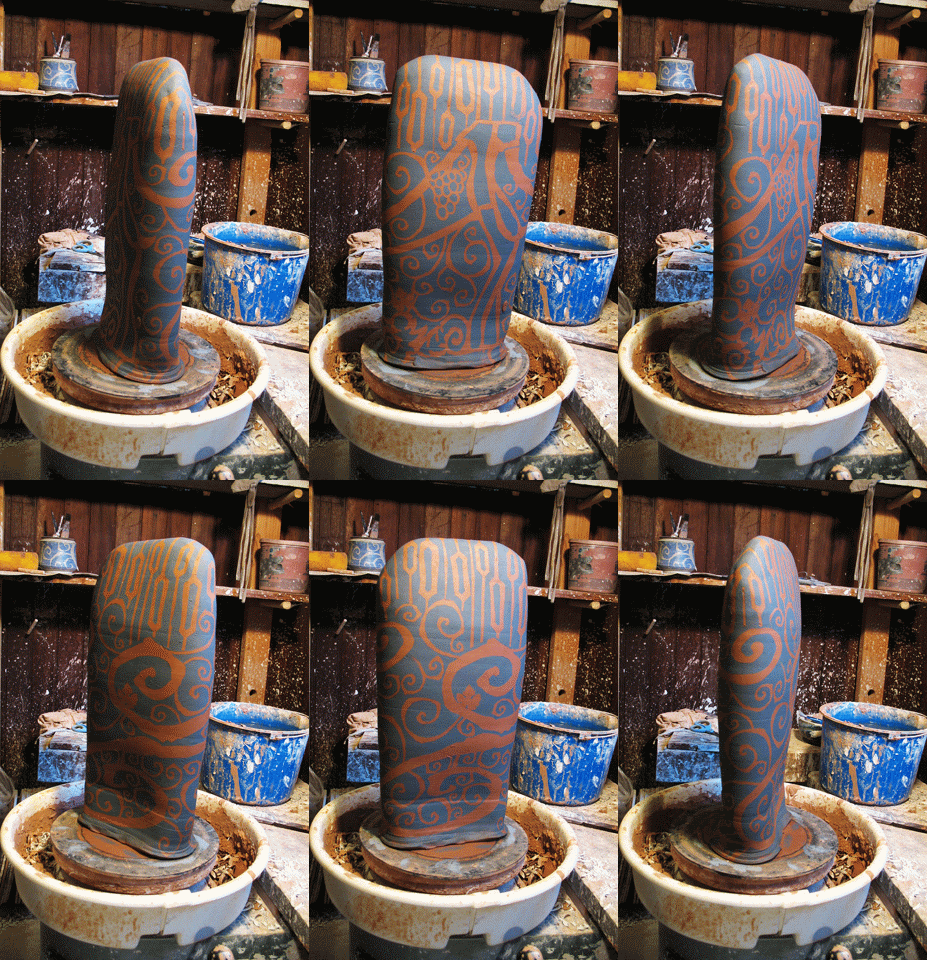 This is the second in the series for this springs first round of works for regional exhibitions. It's still got 2 weeks of drying to do before bisque firing and glazing. 2 cairns down, and 2 to go.
Thursday, October 2, 2008
Throwing Lids for Canisters
I've been taking up some loose time this week with filling inventories for November. My kiln blew an element last week and now I'm passing time until the replacement part arrives. I've been throwing canisters for my local farmers markets.
So... this post is about lids.
I know a lot of potters hate throwing lids, I hear professionals and students alike grump their way through this chore. I've been lucky, I've really enjoyed developing my approach to throwing this type of lid. It's taken a few years and a few hundred lids to work out most of the kinks, but the time spent was well worth it.
 My lids are made with heft, durability, and functionality in mind. They have got to stand up to at least a family's worth of use. They are truly a functional item that need be well crafted to fit to their companion well. Still, at the same time, I create these with an eye on my personal decorative athletics of strong curvilinear lines, clean tight surfaces juxtaposed with textures, and with a well formed knob on top.
So... this post is about lids.
I know a lot of potters hate throwing lids, I hear professionals and students alike grump their way through this chore. I've been lucky, I've really enjoyed developing my approach to throwing this type of lid. It's taken a few years and a few hundred lids to work out most of the kinks, but the time spent was well worth it.
My lids are made with heft, durability, and functionality in mind. They have got to stand up to at least a family's worth of use. They are truly a functional item that need be well crafted to fit to their companion well. Still, at the same time, I create these with an eye on my personal decorative athletics of strong curvilinear lines, clean tight surfaces juxtaposed with textures, and with a well formed knob on top. The carved out concave in the center in the bottom of the lid is purely functional, it helps even out the drying of the form, decrease the weight, improve it's balance, and, well... I like it.
 This is a deceptive shot. I'll usually throw a series of 7- 15 canisters in a sitting. All of the galleys are made to meet whatever my current predetermined inner diameter is. This is a ritual of studio covenience for me, this way I'm free to explore a body's form and the lid will essentally fall into place as it moves through the studio. This piece shown is almost 12 hours old. Shrinkage at this scale makes a huge difference... so pay attention to the "wet measurements" of those openings. Take notes and figure out your shrinkage scales of the clays you choose to use, it really pays off.


Let it dry to leather hard before trimming....

I throw a fresh trimming chuck to softly hold a green lid and slowly enlarge it as I work though a lid series.

 This is a deceptive shot. I'll usually throw a series of 7- 15 canisters in a sitting. All of the galleys are made to meet whatever my current predetermined inner diameter is. This is a ritual of studio covenience for me, this way I'm free to explore a body's form and the lid will essentally fall into place as it moves through the studio. This piece shown is almost 12 hours old. Shrinkage at this scale makes a huge difference... so pay attention to the "wet measurements" of those openings. Take notes and figure out your shrinkage scales of the clays you choose to use, it really pays off.
Let it dry to leather hard before trimming....
I throw a fresh trimming chuck to softly hold a green lid and slowly enlarge it as I work though a lid series.

This is the finished fit for a lid in a greenware canister. I don't approve of excessive slop in the play between the lid and galley. When I throw 15 canister bodies I throw 20- 25 lids and mix and match to fit the greenware.
To get a feel for the entire process, check this out.
To get a feel for the entire process, check this out.
Saturday, September 27, 2008
Trimming a Tall Vase
 This is a quick view of how I trim the foot on a tall narrow necked vase.
To get the piece supported well enough to apply the pressure needed to make my cuts, I throw a thick walled trimming chuck to hold the inverted piece steady. I try to let the fresh chuck set up for a few hours before using it. When I'm ready, I simply invert the vase into the opening of the chuck, level and center the ware and start trimming.
The leather hard chucks are reusable. I simply leave it on it's throwing bat and bag it up well to keep it at a leather hard state. I try to set-up my work scedual to make use of a freash trimming chuck. I cut freash stencils, gather supplies, and throw as much work as I can juggle to finish without loosing control, (not often easy with 2 kids).
Once I'm finally finished using a trimming chuck, it's left to dry out and broken up and put in my bucket of clay scrap for recycling.

 Ta Da!!
Monday, September 8, 2008
TimeFlies Demo

Near the end of July, my son Andor and I began playing with creating a number of small studio videos to share with our friends and family, it's always fun to see what's going on in the studio.
This one is a stop motion video demo of the creation of a yunomi for my TimeFlies series. I really enjoy it, it's got a good rhythm and is short enough to pull a viewer all the way through once. The cup above is the finished yunomi seen being created in the video.
Check it out and let me know what you think.
Subscribe to:
Posts (Atom)